Contact Me

Thank you so much for your interest in my work. I do my best to respond to all inquiries in a timely fashion.


123 Street Avenue, City Town, 99999

(123) 555-6789

email@address.com


You can set your address, phone number, email and site description in the settings tab.
Link to read me page with more information.

Blog

Praesent commodo cursus magna, vel scelerisque nisl consectetur et. Curabitur blandit tempus porttitor. Fusce dapibus, tellus ac cursus commodo, tortor mauris condimentum nibh, ut fermentum massa justo sit amet risus. Cras mattis consectetur purus sit amet fermentum. Cras mattis consectetur purus sit amet fermentum.


Filtering by Tag: holiday

Craft Ideas For Spring: DIY Party Hats!

Ryan Jude Novelline

 “Spring is nature’s way of saying, Let’s party!”
~ Robin Williams

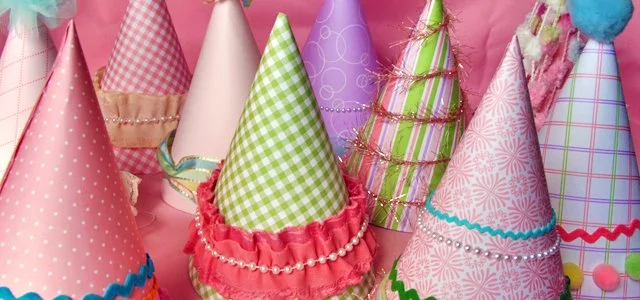
Looking for craft ideas for spring? Look no further! And what says a party like party hats?  Their coordinated whimsy invites children of all ages to celebrate!

When I decided that hats were a must for this year’s spring fling, I set out to buy them and quickly realized not only that the traditional cone hats were somewhat harder to find than they used to be, but also that non-branded and indeed seasonally-themed hats of any kind were virtually nonexistent. No worries, I thought… I will make them myself. And that’s just what I did. :)

Below are instructions, a template, and the details of my specific selections. Enjoy!

 ~

DIY Party Hats

Materials:


  • 8.5 X 11 sheets of card stock or scrapbook paper (one sheet per hat), designs and colors of your choice

  • scissors

  • glue gun

  • transparent tape

  • spool of elastic cord (each hat requires a 14-inch strip)

  • embellishments of your choice

Instructions:


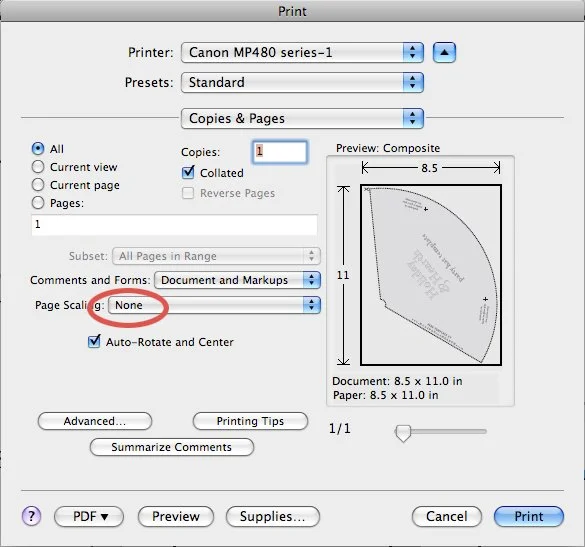
  1.  Click on image below to access free template.

  2. Print template for tracing or simply print right onto the back side of the paper of your choice. As always, to ensure dimensional accuracy when printing templates, be sure to adjust your printer “Page Scaling” setting to “None”.


  1. Using scissors, carefully cut shape.

  2. Roll shape into cone. Be sure top and bottom join. Ideally top will “almost but not quite entirely” close. Allow slight overlap along seam.

  3. Temporarily secure paper in place on the inside with transparent tape.

  4. Gently glue seam with glue gun. **Be very careful to avoid burns during this step, especially if children are helping. Very little glue will do the trick. (A little goes a long way.) And hot glue is very hot indeed. I found it helpful to secure the top in place before gluing the remainder. This ensured that my alignment remained accurate and allowed me to take my time with the hot glue. (See pic. below.)


  1. Remove tape if desired.

  2. Cut a 14-inch strip of elastic cord, and with a dab of hot glue, secure each end of the elastic to one of the  “+” signs on the template.

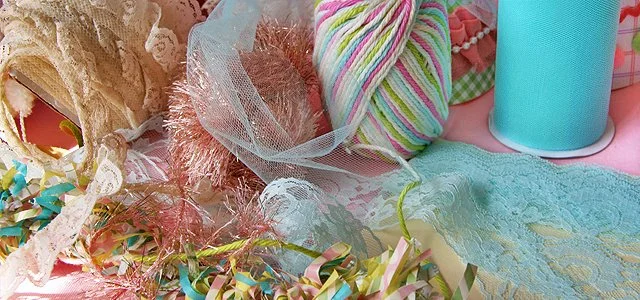
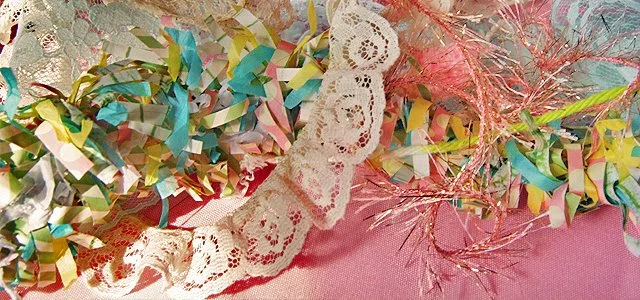
  3. Embellish using any accents of your choice. This is a great opportunity to repurpose left-overs from other projects. I dug into my craft scraps and found rick rack, lace, pom poms, yarn, just to name a few! Let your imagination soar!

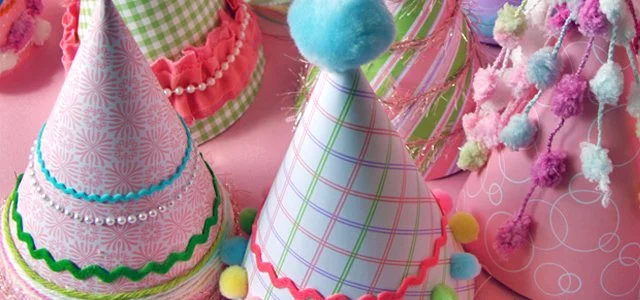
And… voila! What fun!! Craft ideas for spring? Indeed!

Click here to check out the spring tablescape I created, which featured these hats!!

 “It’s spring fever.  That is what the name of it is.  And when you’ve got it, you want – oh, you don’t quite know what it is you do want, but it just fairly makes your heart ache, you want it so!”  ~Mark Twain

~

Happy crafting, and happy spring!

 Published: March 4, 2017

Bunnies! Bunnies! Bunnies!

Lisa Anne Novelline

Spring is just around the corner, and I am so excited! I so love all the natural signs of rebirth and new beginnings! I love putting spring baskets together for loved ones too. In these baskets, I generally try to combine the vivid colors of the season with signs of growth, plant and animal life, and any other joyful seasonal references I can think of! And since nothing says I love you better than a handmade gift infused with loving energy, I try to include some of my own creations!

This year, I found myself with bunnies on the brain! (And I’m not talking about the unhealthy marshmallow ones ;-) Much to my delight, I discovered a fantastic tutorial for any crocheters among us! Using the instructions provided, I created the simply adorable little creatures you see above! As an activity, I found it imminently doable. Click here to visit the instructions. If this tickles your fancy, I have scoured the web for some other fantastic DIY tutorials and ideas, feel free to visit my Pinterest Boards to check them out!

After I completed these sweeties, I found the perfect boxes to house sets of two, Wilton Treat Boxes With Windows. I will be experimenting with decorating the boxes, and when I do, I will update this post with additional pics, but for now, here is what they look like boxed:

Last year, I crafted with bunnies as well! I bought little plush ones and then created tiny spring baskets for them. That was loads of fun, and another way to add a personal touch to a sweet bunny gift! To do this, I simply purchased some petite florals from my local Michaels craft store, and glued them into mini baskets that I purchased very cheaply and in bulk on ebay. Here’s how they came out:

And here is a close up of the baskets:

As gifts, these accompanied one of my very favorite books about bunnies and spring, The Dance Of Spring (and not just because I wrote it, and my son illustrated it! :-) ) It is my tribute to the season! As it is widely available, feel free to click on the title or the picture below for more information.

 That’s it for now, but stay tuned! I have an amazing spring tablescape on the horizon!

Enjoy the last vestiges of winter, and be on the lookout for early signs of spring!!

Published: March 9, 2017